Hosting this blog
A modern approach to blogging
Doing some research trying to figure out what the best (and most cost effective) approach would be to creating and hosting this blog, I was quite surprised to see how much things have changed.
Not so long ago, my goto approach would be to use a well known content management solution like WordPress or Dasblog, find a web hosting provider or service, and off you go. These solutions are feature rich and pretty much self-eplanatory in use, but as I learned on a previous attempt at doing this, costs money, and can become expensive for a reasonably performant user experience.
The New World
The world has changed. Everything is about DevOps, CI/CD (continuous integration/continuous deployment), new tools, new languages and many new concepts. But for hosting personal websites and blogs, I did notice there is an overwhelming amount of content about free, or as near to free, solutions. Then I noticed a trend around moving away from content management systems, due to implementation and maintenance complexity and relatively high costs for little return and shifting to “static web sites”.
This is where static website generators enter the picture. These tools allow you to create websites using varioius common file based tools, like Markown, and once ready you “generate” your static website with all the website plumbing. Popular static website generators today include the likes of Jekyll, Gatsby, Hugo and there are several hundred others to choose from.
I went ahead picked one - Hugo - as the reviews are good and it was at the top of the list when I searched for a solution. The tutorials were also much clearer to follow, which was important for me since I haven’t done this stuff in ages. Additionally, for this blog I’m using the Mainroad theme. The theme page contains a lot of information about how to configure the template, and with a little tinkering, you’re looking at the result.
I was really surprised at how quick this was to setup. Really, I was up and running in 10 miinutes (on my local machine(s)), but I did have some pre-requisites in place already.
Once you’ve started creating content in Hugo, you’ll need a place to host your website. There are many tutorials around with various combinations of services (I’m focusing on Azure based solutions, since I live in Azure):
- Azure Storage Account and CloudFlare
- Azure Storate Account and Azure CDN (this one is popular)
These are great solutions, and super cheap, a couple of cents or maybe dollars, but extremely affordable. However, there is a new feature in Azure in preview: Azure Static Web Apps which is FREE for most purposes, and doesn’t require anything else (CloudFlare, Azure CDN). This is what I’m using.
Then to complete the CI/CD dream, you need a repository and pipelines (for deployment). In Microsoft world, you have two options: Github and Azure DevOps. I picked Azure DevOps since I’m working on a several projects that use Azure DevOps, but I may add the Github solution in another post. In any case, both have a free offering.
What You Need
You’ll need a couple of things ready before you start, here are the pre-requisites:
- Git - you should have git installed for the full experience (if necessary we can cover this in another post, installed by default on MacOS). If you don’t have it installed you can get it here.
- An editor, I’m using Visual Studio Code on all platforms.
- In VS Code, it helps if you install extensions that make editing easier, like Markdownlint, etc.
- A very basic understanding of Markdown. Have a quick read here for more information.
- An Azure subscription, Free Trial if you just want to experiment, or a Pay-As-You-Go subscription - does require a credit card, but as I mentioned this solution is completely free. There is a link on pretty much every page at azure.com to “start for free”.
- And for the purposes of this blog, Azure DevOps.
And then, of course, your static web generator of choice, in this case: Hugo.
How I Did It
Setting up Hugo
Depending on your OS, there a different approaches to installing Hugo (I have both). You will need to open Terminal (MacOS/Windows) or if you don’t have Terminal on Windows, use Command Prompt or PowerShell:
- Windows
- Use Chocolatey, if not installed follow the instructions here
- Install Hugo using Chocolatey.
- MacOS
- Use Homebrew to install Hugo
Once installed, I followed the instructions on the Hugo Quickstart page to get started.
To summarize those steps:
-
I created a directory dedicated to source code.
Create the directory fairly close to the drive root to avoid path/filename limits in the future. I created a “source” folder directly in my user directory:
"c:\users\<username>\source". -
Now we create the website:
hugo new site blogspringstonenet -
Next download your preferred theme, I’m using the “Mainroad” theme: Mainroad, and extract it into the “themes” subdirectory. The result should be a subdirectory called “mainroad” in the “themes” folder.
-
To apply the theme to your blog you need to edit the config.toml file in the home directory of your newly created web site. Open “config.toml” with VS Code, and at the bottom of the file add
theme="mainroad"and save the file.
-
Back in the home directory of your new website, it’s now time to create your first blog post:
hugo new posts/my-first-post.md -
Open the file in VS Code, and this is where we start typing our blog using the little bit of Markdown knowledge we gathered from the link above.
Start writing your blog after the last “—”
-
Once you’ve added some content, be sure to save the file.
-
One of the great things about Hugo is the ability to edit and review your handy work on the machine locally. In order to see your work run the following in your web sites home directory:
hugo server -DTo stop the server running, press “Ctrl-C”.
-
Now take your favorite browser and open “http://localhost:1313”
Hooray, you’ve got your blog running locally on your pc!
Azure DevOps
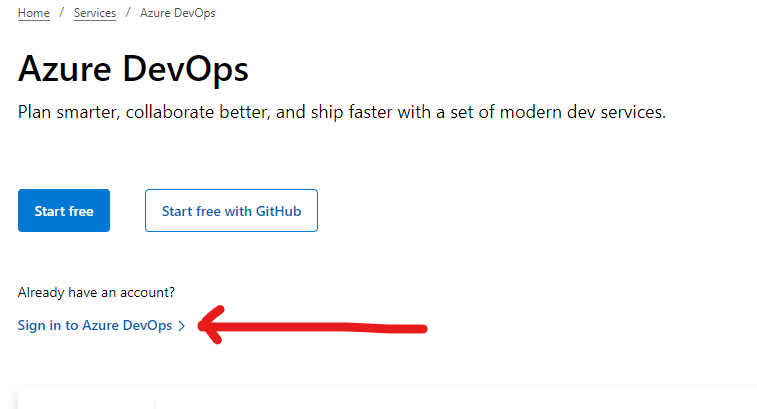
For the purposes of this section, I’m assuming you’ve create a free account in Azure DevOps.
To get to the working environment, make sure to sign in:
- Create a “New Project” and give it a sensible name, in my case “blog.springstone.net” and leave all the defaults.
The most important area in DevOps at this time is “Repos”. When you initially click on the “Repos” link, you will be presented with some options:
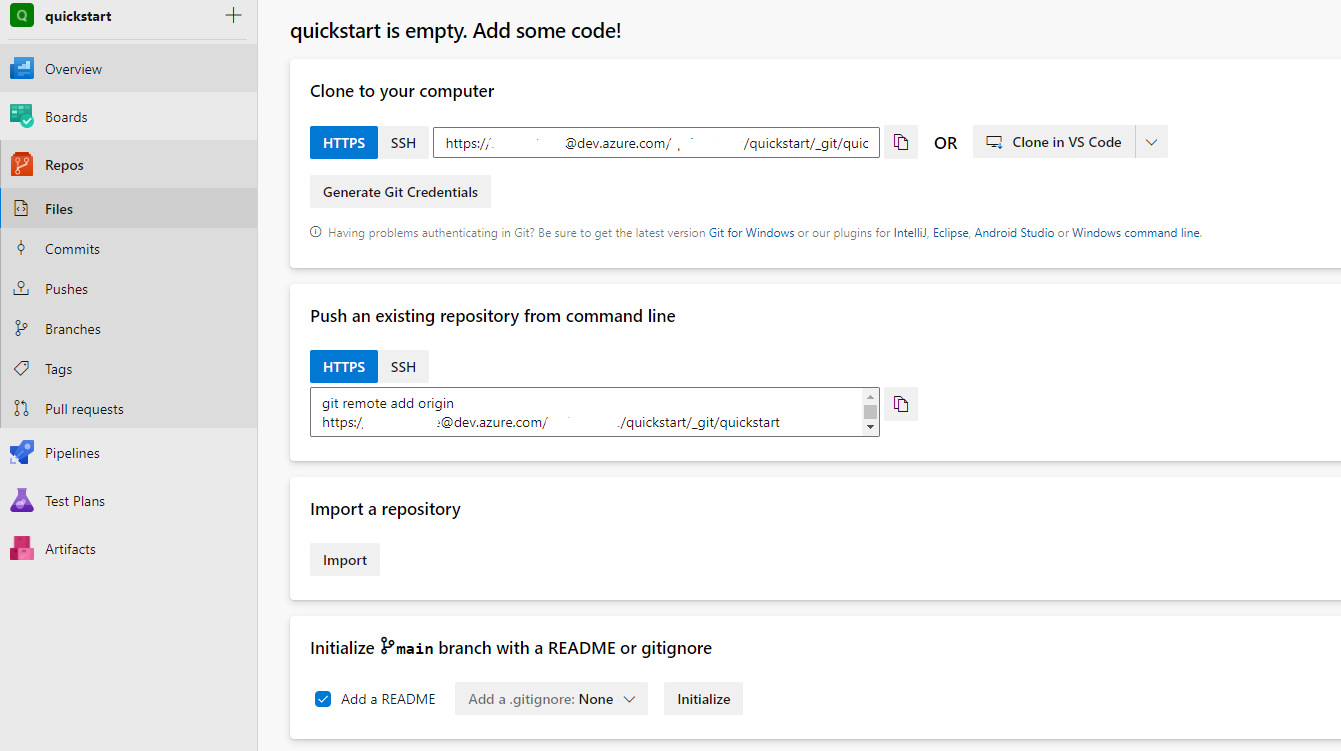
There are several ways to proceed, but the easiest is to Initialize the repo using the button right at the bottom (leave all the settings as is). Once you’ve initialized, you’ll get the following view:
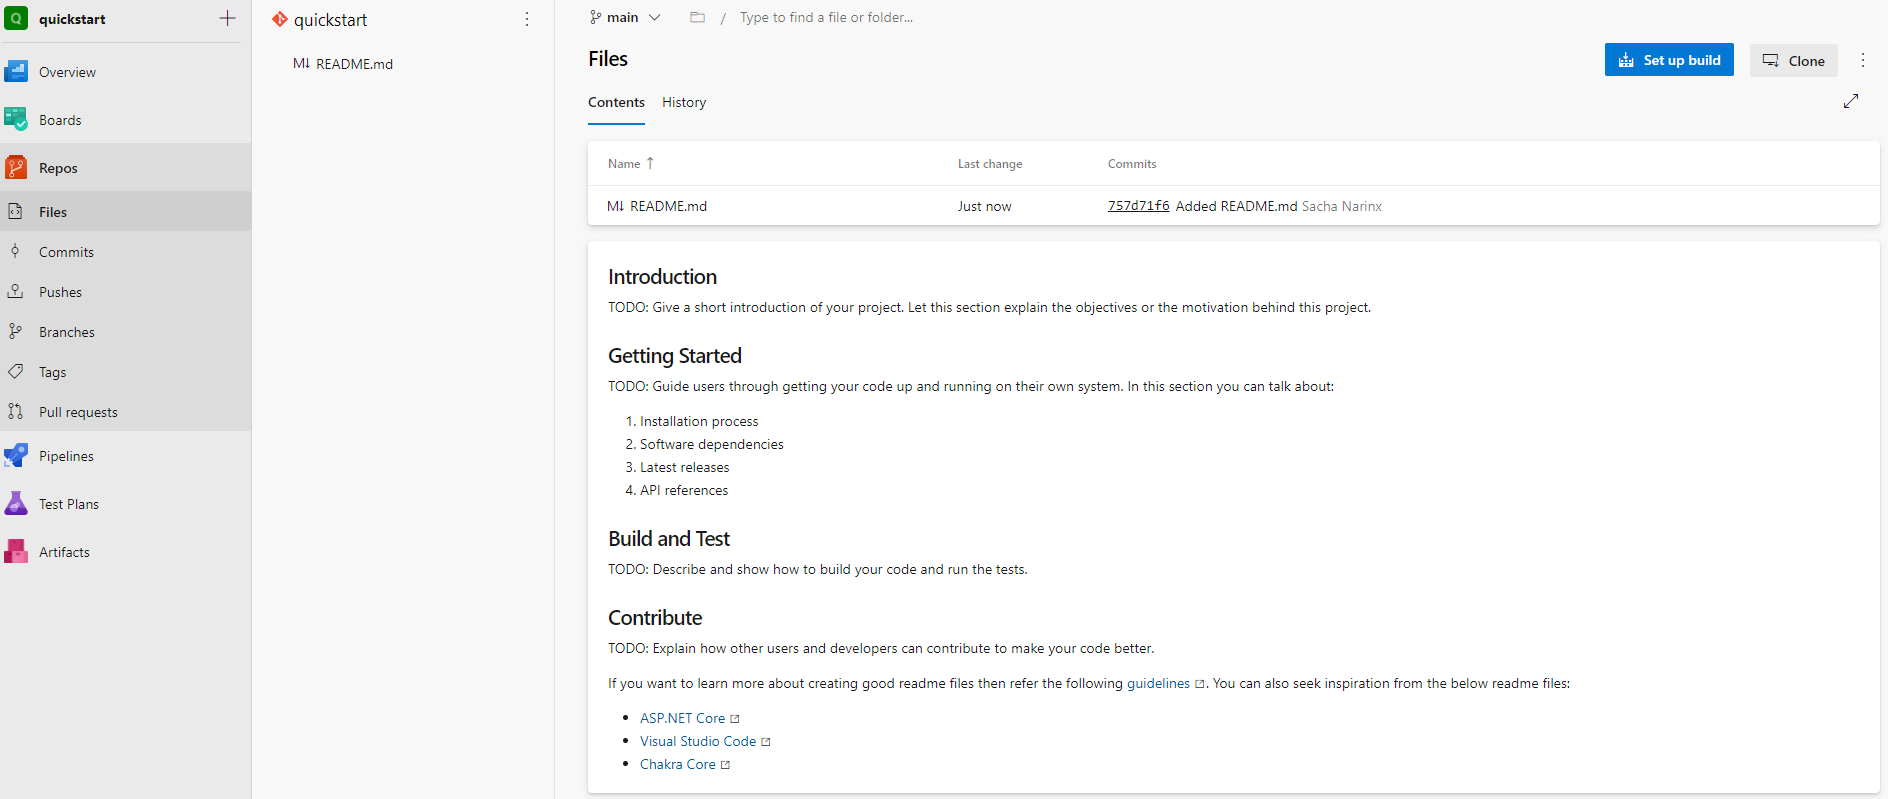
- Now we are going to clone the repository to our local machine. Hit the “Clone” button top left. The easiest is to us VS Code, so proceed with “Clone in VS Code”.
- You will get a prompt asking you if you want to open Visual Studio Code, choose “Open”.
- Choose a folder where you want to clone to, in my case:
"c:\users\<username>\source"
I probably did this the wrong way round, I’m literally documenting this as I went through it. If your Azure DevOps (ADO) project name is the same as the directory you created for your Hugo website, a new folder will be created with a “-1” appended. If it’s not the same it will create a directory with the same name as what you used for the ADO project. This is your source code directory.
You should now have VS Code open (or click the “Open” button, at the bottom right after the clone). The next step is to copy you Hugo website into this new directory (with Explorer or Finder), goto the folder containing your Hugo site, select all, copy, goto the folder created cloning from ADO, and paste.
This is now you main folder where you should be editting you site/blog etc. You can delete or archive the original folder.
I’m also assuming that you have git installed and configured. If not, have a read through this VS Code and git support.
- Now it’s time to commit our initial code (the Hugo site) to Azure DevOps. You do this from the Source Control (Ctrl+Shft+G) panel (on the left of VS Code). At the top add a “message” like “Initial commit” and click on the check mark to commit your changes.
- Then you need to sync your changes to ADO. Click on the ellipses (”…") at the top and select “Push”. An easier way to do this is to click on the “refresh” icon in the blue bare at the bottom. It should be next to the word “master” or “main” depending on your root branch name.
We still need to configure the CI/CD pipeline, but we’ll come back to that.
Azure Static Web Apps
Next we’ll setup the Azure Static Web Apps service so we can deploy our website/blog for hosting (for free).
- Create a Resource Group, call it something meaningful, and choose an Azure region that makes sense to you (for me it is usually West Europe). All Azure services must be deployed into a Resource Group, so this is always the first thing you will do in Azure.
- Once you’ve created the Resource Group, it’s time to deploy the Static Web App service. In the search bar at the top in the Azure Portal, type “Static Web Apps” and select that service. Next we’re going to create an instance for hosting: click on the “Create static web app” button in the middle of the screen.
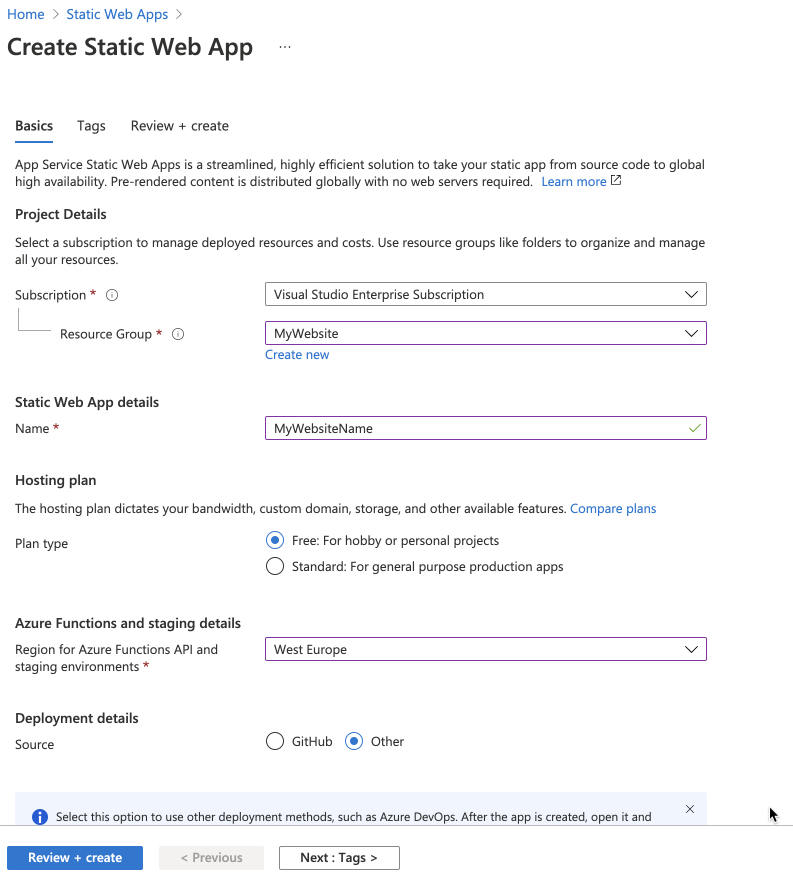
- Make sure you select the Resource Group you previously created.
- Give it a meaningful name.
- For the plan type, because this is a peronal project, and that is free, that’s the one we’re going with.
- For the staging details, make sure you choose the same or nearest region to what you chose for the Resource Group.
- For the Deployment details source, choose “Other” - since we’re using Azure DevOps.
Go ahead and click “Review + Create” and once validated, click “Create”. Once the deployment completes, select “Go to resource”, and it should look something like this:
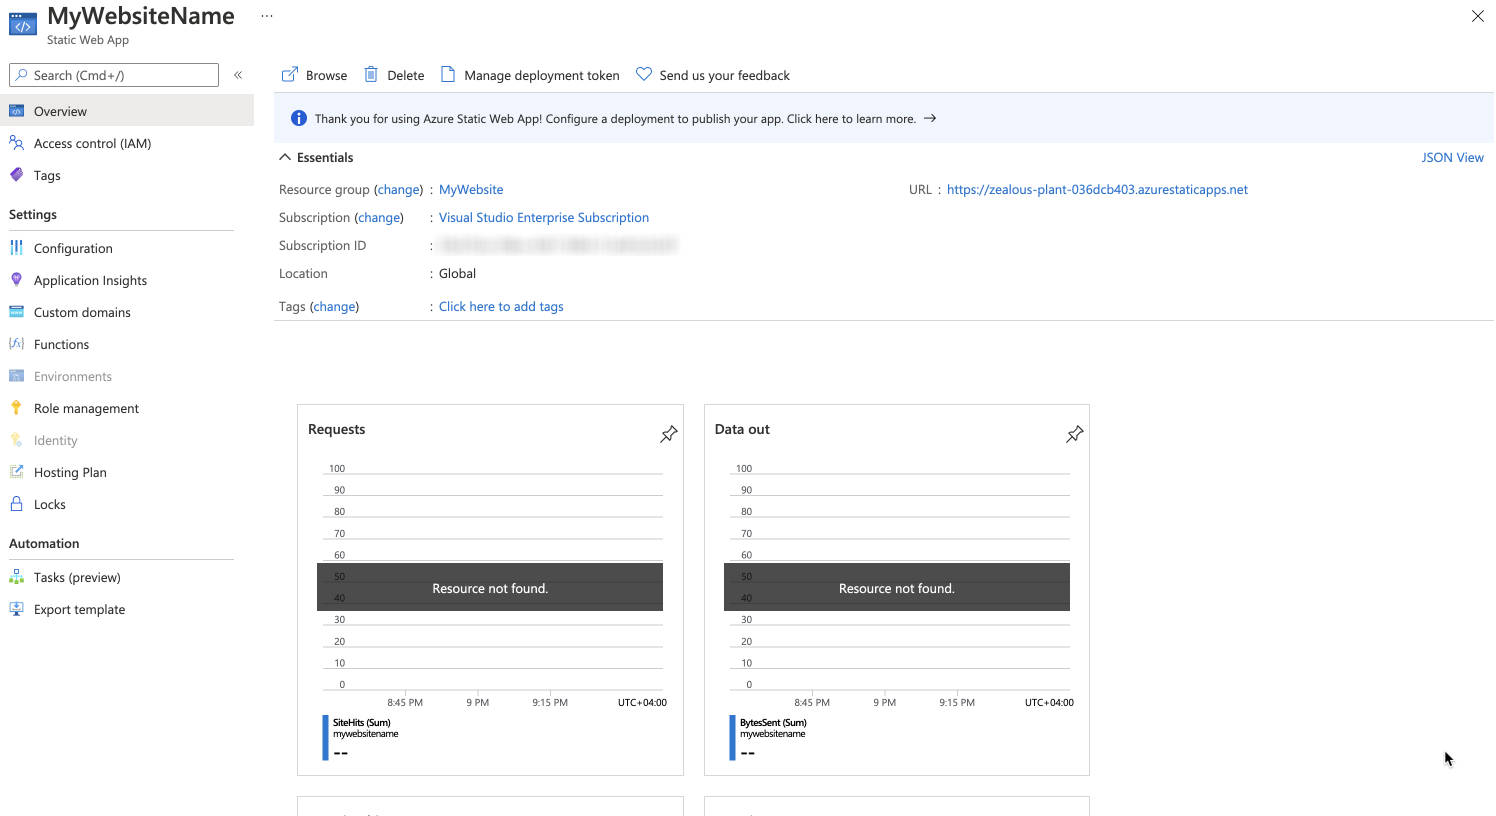
There are 3 noteworthy elements to take note of:
- The URL. Azure generates a ready to go URL for you, so you can immediately browse to it.
- Of course, this URL is not very practical, so if you own a domain name and have access to the DNS management, you are able to add your own domain under “Custom domains”. It will take a bit of time to validate and activate.
- For now the most important element is the “Manage deployment token” at the top of the page. Click on this, copy the deployment token, and paste it in Notepad or somewhere handy.
Back to Azure DevOps and the Pipeline
Head back to Azure DevOps. We need to install and extension to enable Hugo support in Azure DevOps. Follow “this link” and click on “Get it free” to install the extension.
In your Azure DevOps workspace go to “Pipelines” and create a “New Pipeline”:
- Choose “Azure Repos Git”
- Select your repository
- Choose “Starter pipeline”
On the “Review your pipeline YAML” page, paste the following YAML (select and replace all):
trigger:
  - master

pool:
  vmImage: ubuntu-latest

steps:
  - checkout: self
    submodules: true
  - task: AzureStaticWebApp@0
    inputs:
      app_location: '/'
      api_location: 'api'
      output_location: 'public'
      azure_static_web_apps_api_token: $(deployment_token)
Additionally, we need to add a variable. Click on the “Variables” button (top right) and create a new variable called “deployment_token”. For the value of this token use the value of the token you copied in the previous section, hopefully it’s still sitting in Notepad.
Save and Run!
And that’s it. Now you can follow the steps above to create new blog posts (in my case), commit them to git and sync/push the changes into Azure DevOps. Once a change is detected in the branch, a build is triggered that deploys your Hubo static web site.
I hope this was helpful, and you managed to follow the steps easily enough. Do comment if you are stuck, I’ll try to help out.